2FAs are everywhere for good reasons, but there are times where they really get in the way. For example, when you have team projects, and need a test account that you can share to get standardized results. This is a small how to guide on how to setup a phone number using Twilio and send messaging / SMS content to Slack. Now, there are existing solutions like Slack plugins that can do the same thing out of the box, but they will cost many times more than this how-to guide. Also, Twilio has a guide on how to achieve it, but they use Slack incoming webhook feature, which is deprecated. The recommended method requires setting up a Slack app and gets complicated very quickly.
Let's get started
- Open Twilio account and buy a phone number
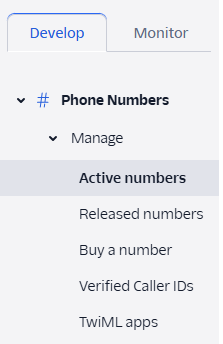
Opening a Twilio account is free, and they will give you $15 to spend. Go to the "Phone Numbers" product and "Buy a number". Follow the instructions and get yourself the number that you want. Tip: You can choose a number from a specific country, city etc.
- Let's leave Twilio for now and we will come back to it later. Open a Wrk account and design your own Wrkflow
Wrk account is also free to open, and you get $35 of free credits to use per month. Once you have your account, click on "Design my Own" Wrkflow button.
- Build your Wrkflow as shown in this screenshot.
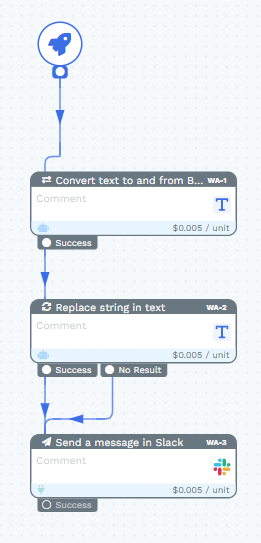
Use the follow WrkAction:
Convert text to and from Base64 - The reason is that Twilio sends their payload in base 64 encoding and it's unreadable until it's decoded.
Replace string in text - This is simply to make the content easier to read.
Send a message in Slack - This is the end goal.
Now, let's configure the Wrkflow. First click on the rocket icon:

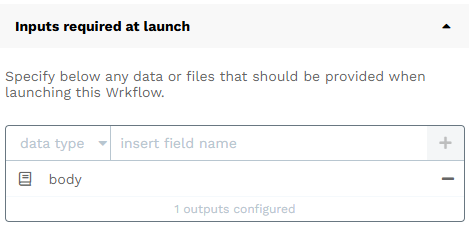
On the right panel, under "inputs required at launch" - choose "text (long)" from the dropdown, type "body" in the field then click the "+" button. It should look like this:
Press "Confirm".
This indicates that the Wrkflow will expect data from the body, in form of a text when it launches.
Next click on the first WrkAction "Convert text to and from Base64".
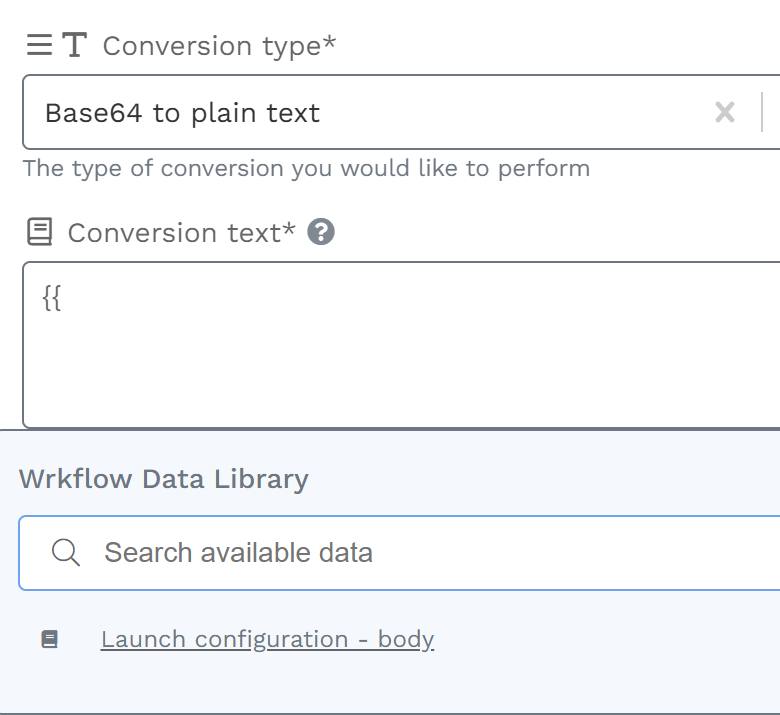
On the right panel, choose "Base64 to plain text" under the "Conversion Type" dropdown. Then in the text box, type {{ , which should open up the Wrkflow Data Library and choose the "Launch configuration - body" from the list. This indicates that it will take the content from the launch "body" and convert it from base64 to plain text.
Press "Confirm".
Next click on "Replace string in text".
On the configuration panel, type in {{ in the "Text" text box, and choose "1 - Convert text to and from Base64 - Converted text" from the list.
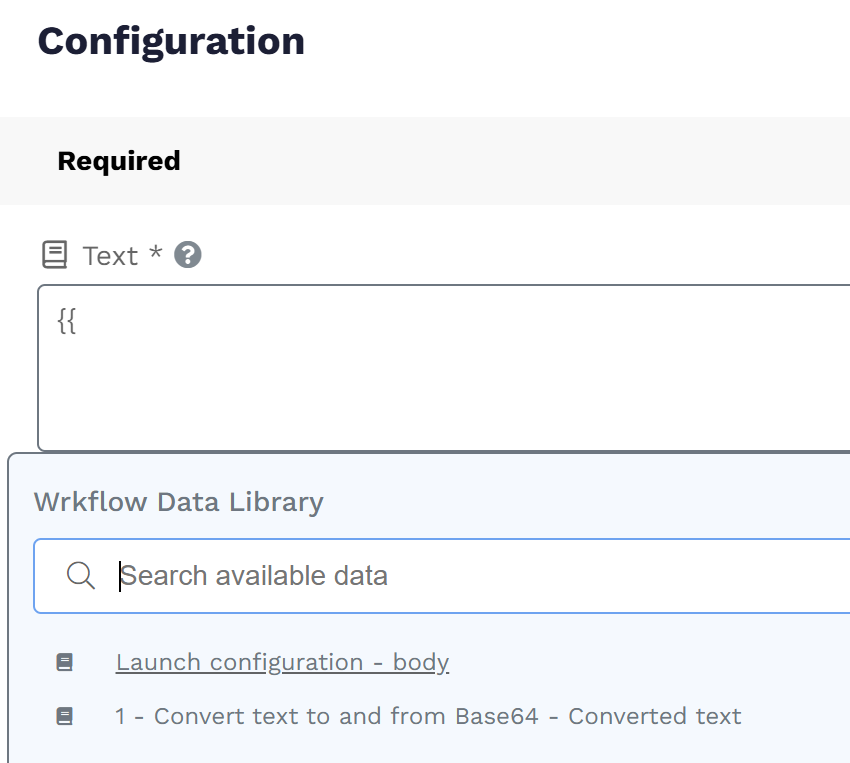
Type in & in the "Find string" field, and type in \n in the "Replace value" field.
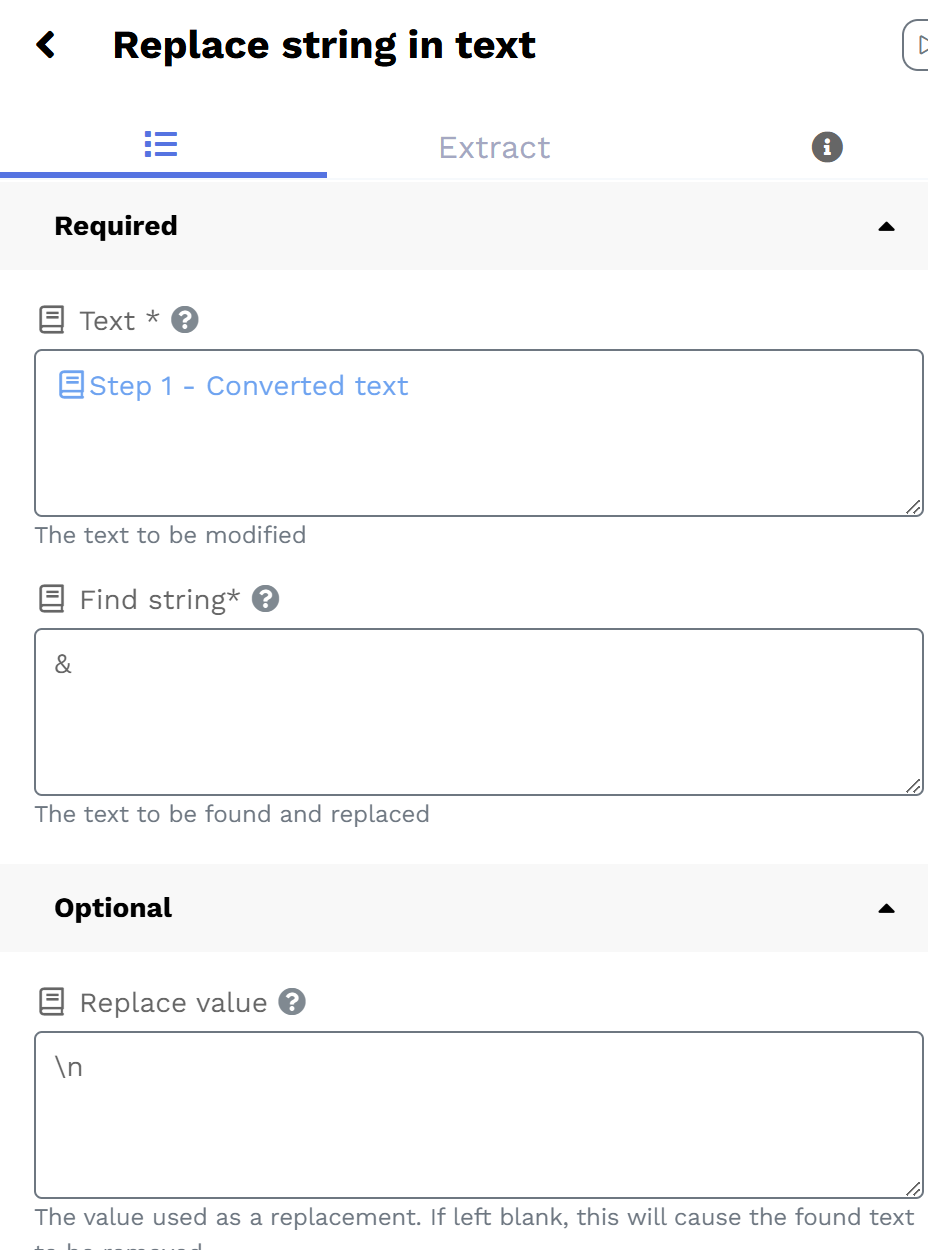
What this will do is take the decoded base64 body and replace any '&' with a '\n', which is simply how Slack interprets line breaks. This should make the content a bit more readable when it gets to Slack.
Press "Confirm"
Lastly, click on "Send a message in Slack".
Under "Slack connected account", click the dropdown and click on "Connect Account". Follow the steps to connect your Slack account. This will use OAuth, which is the preferred and secured method to connect to Slack without the hassle of creating a Slack app and meddling with API keys.
Under "Channel ID", insert the channel ID that you want the message to be posted to. To get the channel ID, go to your channel in Slack (create a channel if needed). Click on the channel in the left panel, then click on the name of the channel at the top

This will pop up the channel's about section. At the bottom on the popup, you will see "Channel ID".
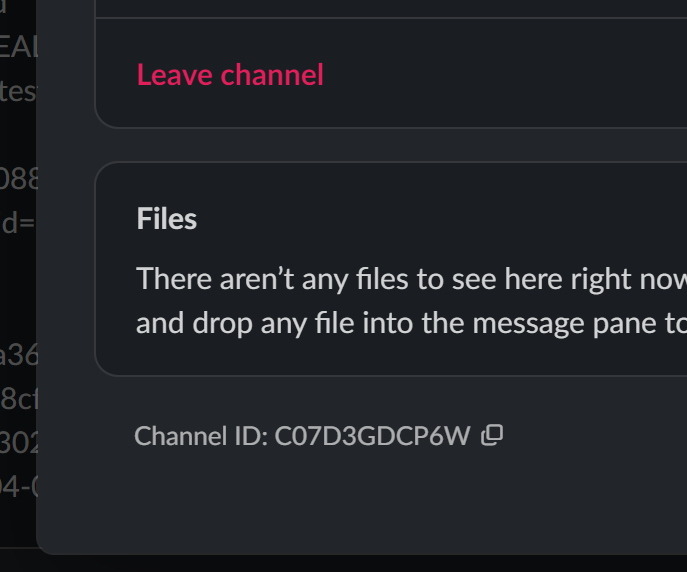
Copy-paste the value to the "Channel ID" field.
Under "Message", type {{ and choose "2 - Replace string in text - Edited text" from the list.
This will take the content from the previous Wrk Action and post it to the Slack channel that you chose, using your Slack account.
Press "Confirm"
Your Wrkflow is now ready. You can give it a name by clicking on the "Untitled Wrkflow" and typing in the name - e.g: "Twilio to Slack". Then click "Save" and exit the Designer using the "<" button on the top left.
You should now see this on your screen:
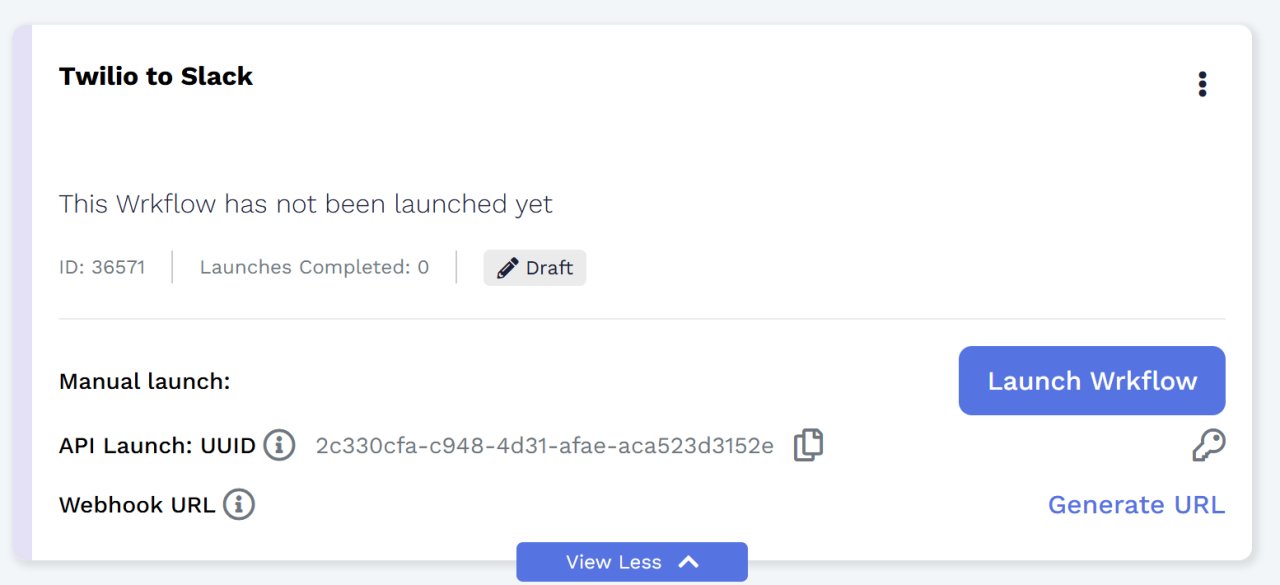
Click on "View More" and click on "Generate URL" on the right side of "Webhook URL". This will generate a wehbook URL. Copy the content of the URL.
You should keep this URL safe and avoid sharing it as it will allow anyone with this URL to trigger a message to your Slack.
- Now, let's head back to Twilio. Under Phone Numbers > Manage > Active numbers, click on the phone number you created in step 1. You should see a Voice Configuration and Messaging Configuration screen.
Scroll down. Under Messaging Configuration - locate the line where you see "A message comes in" field, then "URL" field. In the "URL" field, paste the webhook URL that you copied from Wrk.
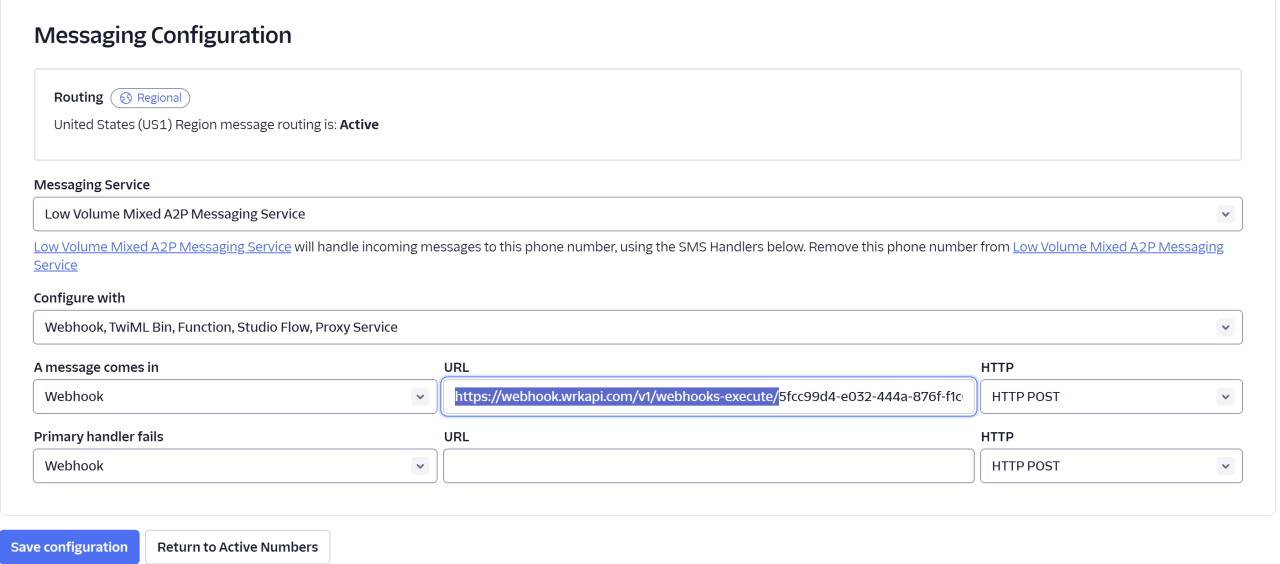
Press "Save configuration"
- You should now have a Twilio to Slack workflow that will send any message received to the Twilio phone number and post it to Slack. Send a SMS to the Twilio phone number to test it out. The Slack post should look something like this:
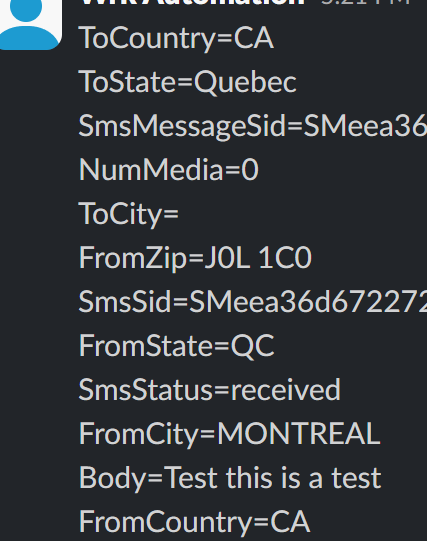
The content of the message is on the line "Body="
In terms of cost, at the moment of writing this how to guide, the Twilio phone number costs $1.50 / months. With the free credits, it should last you a few months before you need to upgrade the Twilio account with a credit card. On the Wrk platform, each message will cost 1c and with the $35 of free credits per month - you can receive up to 3,500 messages per month. For free.
You can now invite whoever you want to share the Twilio message to the Slack channel and enjoy this free solution.